Installing Extensions
A browser extension is a piece of software that expands (complements) the functionality of the browser. It is also able to integrate into cloud software through the browser. You can download and add to Octo Browser any extensions available for regular Chrome. Adding extensions is only available for Windows and macOS profiles and is not available for Android profiles.
You can consult our video tutorial covering adding extensions here:
Installing extensions
In order to install an extension to Octo Browser, you need to enable saving extensions in the required profile Settings (→ Storages).
You can install an official extension in two ways:
Installation using Create/Edit Profile (Template) Menu
- Go to "Extensions"
- Click "Add a new extension" button
- Paste a link to the extension page in the Chrome Web Store in the "From the Web Store" tab
- Click the "Add" button
Installation using a running profile
Start a profile and install the desired extensions using the Chrome Web Store. Next, close the profile to synchronize the extensions installed in the account.
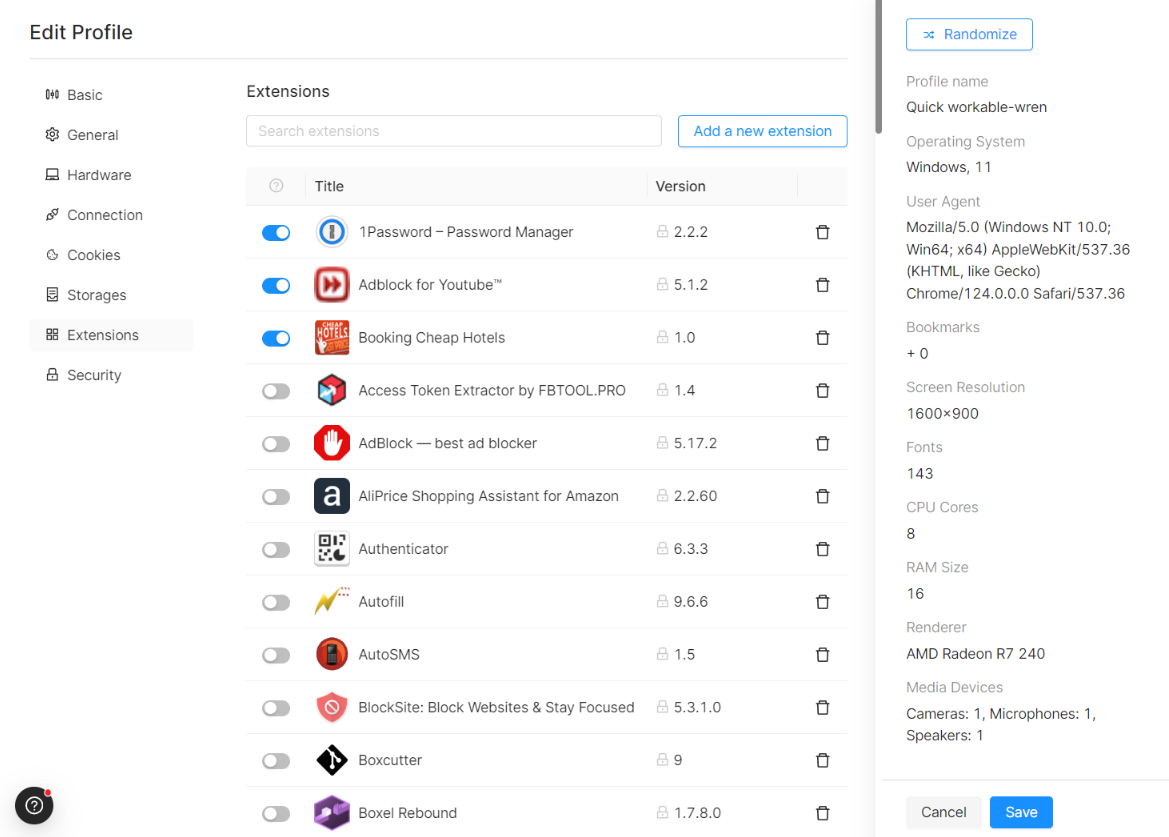
The installed extensions will be displayed in the "Extensions" tab in the Settings of this profile.
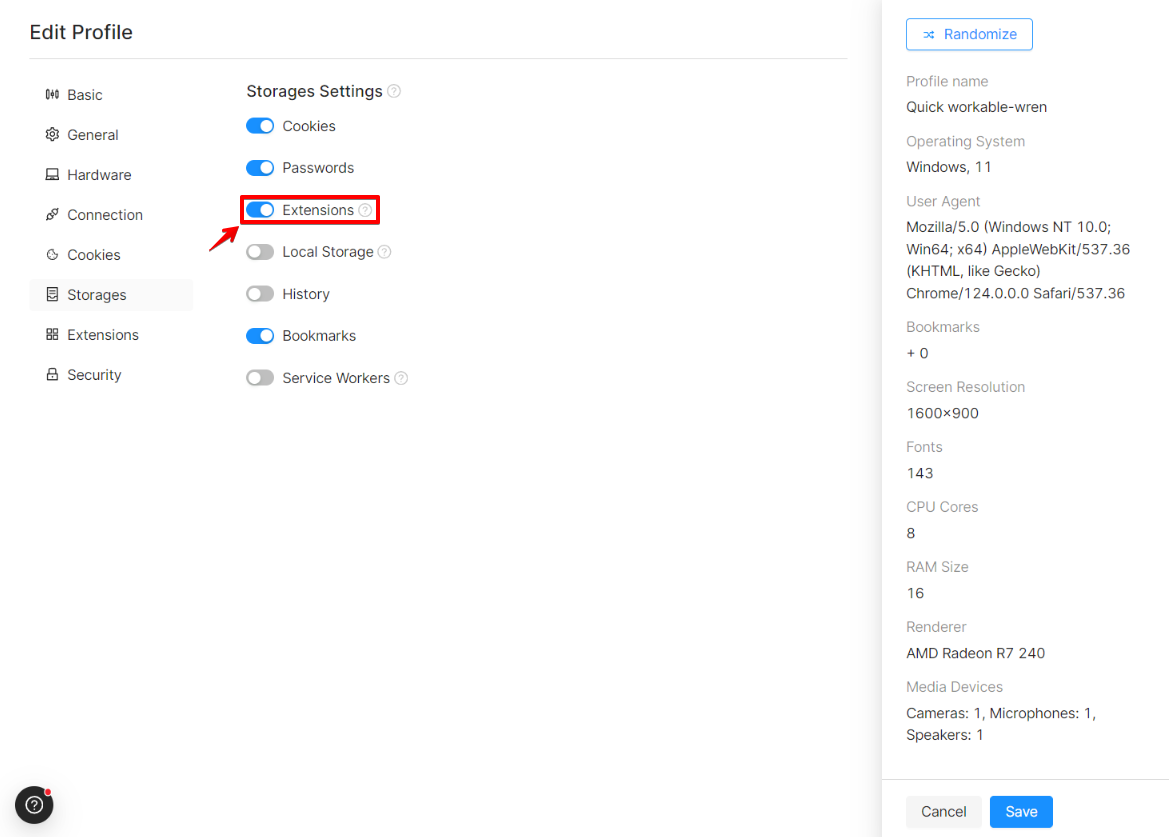
After adding extensions to a profile, they will appear on the list for all team members on all devices. You can also select extensions from the list (without re-installation) and assign them in the Settings of other profiles, provided that this option is enabled in Storages → Extensions.
All extensions are stored in the cloud and cached locally on the device. Extensions are available to all team members and are linked to each user's account. Extensions added to a profile are not transferred to other Octo Browser accounts (for example, when transferring a profile).
Installing custom extensions
Installing a custom extension using the Extensions menu
- Open the Create/Edit Profile (Template) Menu
- Go to "Extensions"
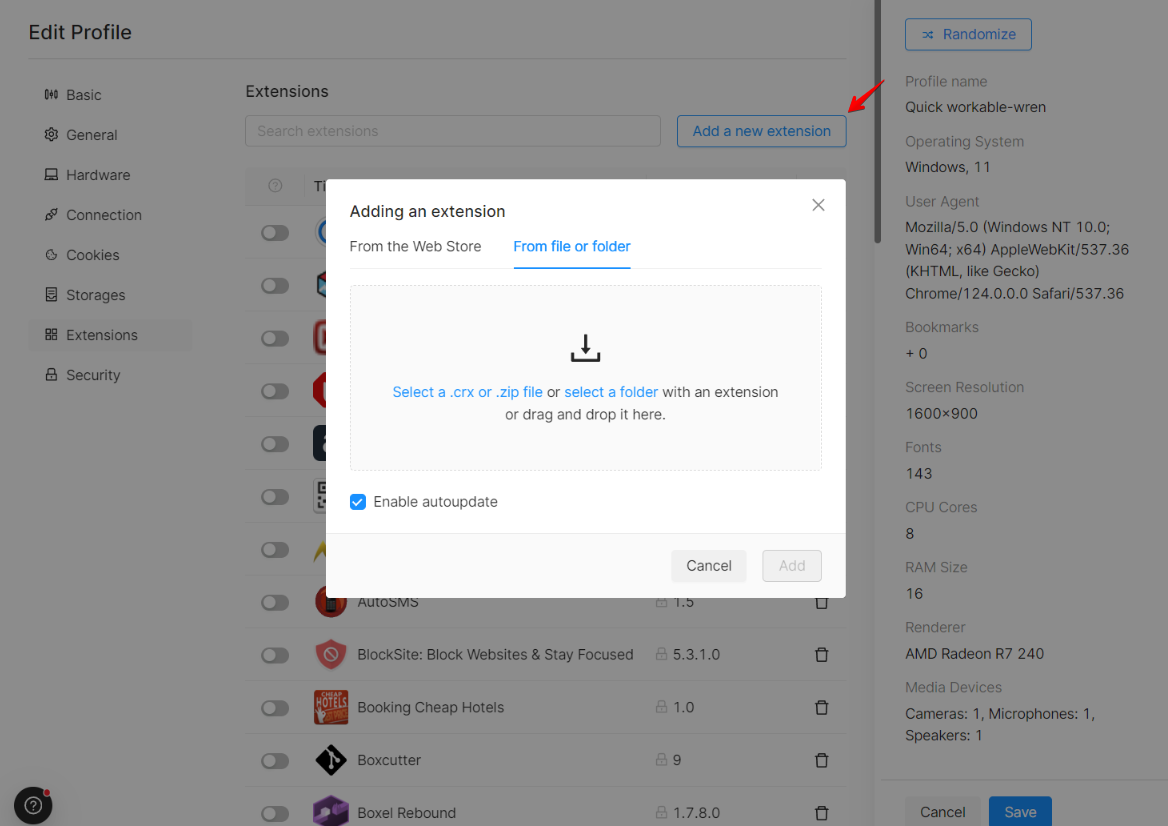
- Click "Add a new extension" button
- In the modal window, go to the "From file or folder" tab
- Select a .crx or .zip file with an extension, or a folder with an unpacked extension. You can also drag and drop the extension file (.crx, .zip) or folder
Installing a custom extension using the developer mode
- Open the Extensions page in the browser: browser menu in the upper right corner → Extensions → Manage extensions; or copy the path chrome://extensions/, paste it into the address bar of the browser and press Enter.
- Activate the "Developer mode" switch in the top right corner. You will see 3 additional buttons below: "Load unpacked," "Pack extension," "Update."

- Rename the extension file ending in .crx so that it ends in .zip, and open it with an archiver as a regular archive. If the custom extension is already in a .zip archive, open it as a regular archive. Unpack it into a folder you have prepared (for example, create an Extensions folder on the C:/ drive, or use any other name).
- On the Extensions page in the browser click on the "Load unpacked" button, select the folder you have created in the window that appears, and click "Select folder."
- The extension will be installed in the browser. Now all you have to do is activate it by toggling on the switch next to the extension.
Custom extensions are available to all team members, are tied to each user's account, and are not transferred to other Octo Browser accounts (e.g. when transferring a profile).
Updating extensions
Extensions are automatically updated just like in Chrome. If extensions are not automatically updated in Chrome, they will not be updated in Octo Browser profiles.
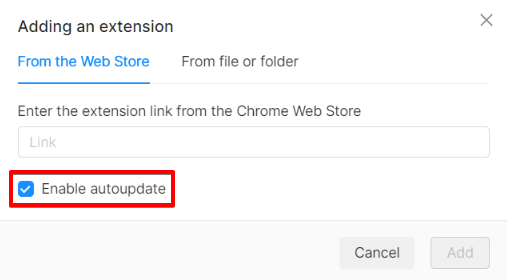
You will see the "Enable auto-update" checkbox after clicking on the "Add a new extension" button in the Create/Edit Profile (Template) menu. This checkbox is enabled by default. If this checkbox is enabled, Octo Browser will not modify extension files. The extension will be updated according to the extension settings. If this checkbox is disabled, the extension's auto-update will be blocked. If you don't want the extension to update automatically, disable this checkbox. If you are adding an extension from a file, you can remove the "KEY" parameter from the manifest.json file to prevent the extension from updating automatically.
Disabling extensions
To disable an extension from an Octo Browser profile, you need to:
- Open the profile Settings and go to the Extensions tab (Vertical ellipsis → Edit Profile → Extensions)
- Deselect the extensions you would like to remove
- Save the profile
The deselected extension(s) will not be added on subsequent launches of the profile.
Bulk extensions management
You can install or disable profile extensions in bulk in the Octo Browser client app:
- Tick the checkboxes on the desired profiles
- Click the "Extensions" button at the bottom of the Octo Browser client app interface
- Enable or disable the required extensions by clicking on the "+" or "-" icons
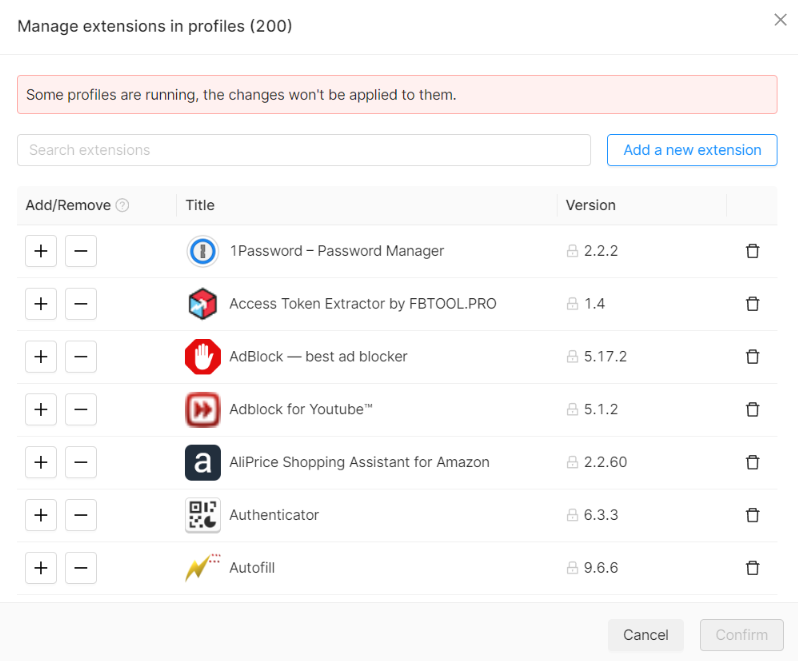
The changes will not be applied to the profiles that are currently running.
IMPORTANT!
Bulk changes cannot be made to more than 1,000 profiles at a time.
Removing extensions
Removing extensions will completely delete them from the extensions list of your Octo Browser account. Removed extensions will also be deleted from profiles and templates where they have been previously enabled.
- Open the Create/Edit Profile (Template) Menu
- Go to "Extensions"
- Click on the Trash Bin icon next to the corresponding extension
IMPORTANT!
Do not delete extensions that may be used by running profiles at the time of deletion. After closing the running profiles, such extensions will be added again to the available extensions list. We recommend closing all profiles before removing extensions.
An extension does not work or disappears from the list
Make sure that you have installed the extension exactly as specified above. Make sure that the Extensions are activated in the profile Settings → Storage.
An extension is duplicated
Such a situation may arise if you have installed an extension from an unofficial source, and the KEY parameter is missing from manifest.json there. If you add such an extension to a profile, every profile launch will create a duplicate of the extension because the KEY is missing.
You need to deactive such an extension in all profiles; otherwise, the extension will duplicate on profile start, and the list will keep growing. If such an extension is necessary in your work, you can either install it from an official source (e.g., Chrome Web Store), or add the KEY parameter to the manifest.json file to prevent the extension from duplicating.