How to Connect Webshare Proxies
Connecting and configuring your proxies from Webshare in Octo Browser is very simple. Follow these steps and get started in just a few minutes:
1. Access your Webshare proxy list
Log into your Webshare account or create a new account if you haven’t done so already. All new users automatically receive 10 free datacenter proxies & 1GB/month of bandwidth to use for as long as they want.
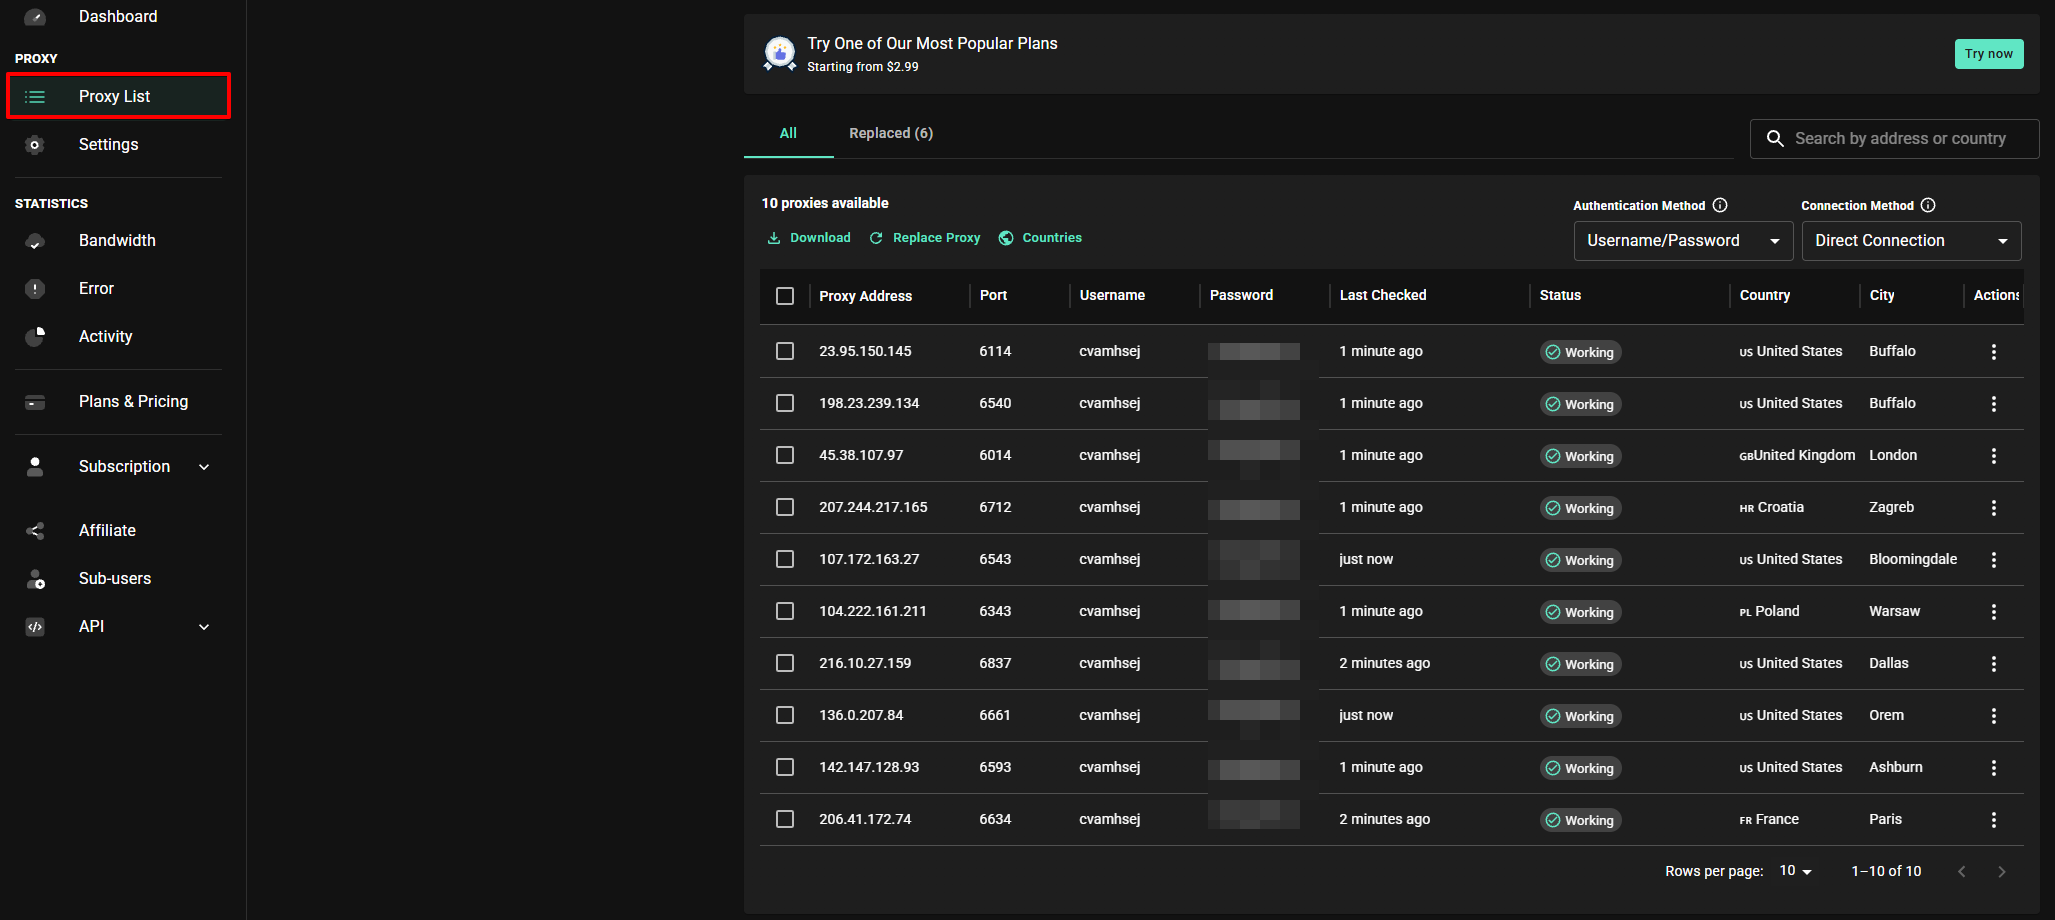
Once you’re inside, navigate to your Proxy List.

2. Copy proxy data
Copy the ‘Proxy Address’, ‘Port’, ‘Username’, and ‘Password’ values of your desired proxy from your Webshare proxy list.
Now open Octo Browser and choose the Proxies tab. Click Add Proxy.

3. Add the proxy to Octo Browser
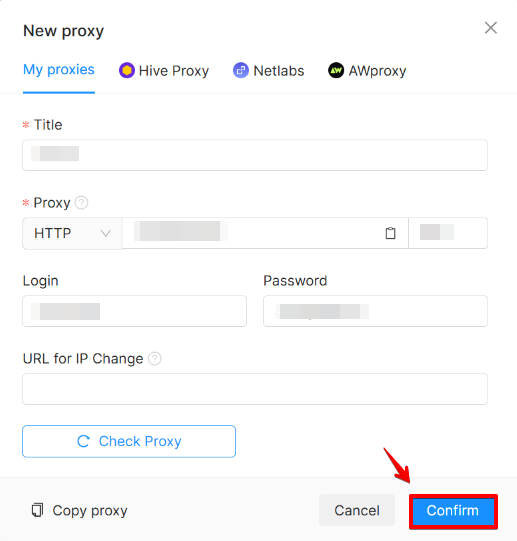
A box will appear asking you to provide the data of the desired proxy. Fill out the corresponding fields with the data you copied from your Webshare proxy list.
- Title – give the proxy a name of your choice
- Type – SOCKS5 or HTTP
- Host – IP address (from Webshare)
- Port – port (from Webshare)
- Login – username (from Webshare)
- Password – password (from Webshare)

Finally, click on Check Proxy to ensure it works properly. If everything is as it should be, simply click Confirm and your proxy is ready!