Adding iProxy proxies to Octo Browser
IMPORTANT!
iProxy proxies are configured through their official Android smartphone app. Check out the official guide from the provider at this link: "Creating and Configuring iProxy".
Creating a new connection in your iProxy account
- Log into your personal account on the iProxy website.
- Click the "Create connection" button.
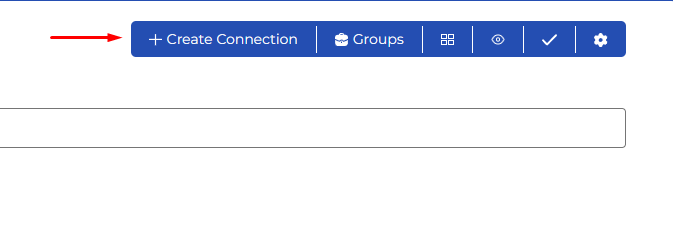
- Select the location closest to you and specify a name for the connection. The HTTP protocol is used by default for the created proxy connection.
- A new connection will appear on the list. Click on the gear icon to go to the connection editing menu.

- Go to the "Proxy" section in the "General" tab.
Here you can edit already existing proxies, and add new ones. You can create both socks5 and http connections (proxy access protocols) for one access point.
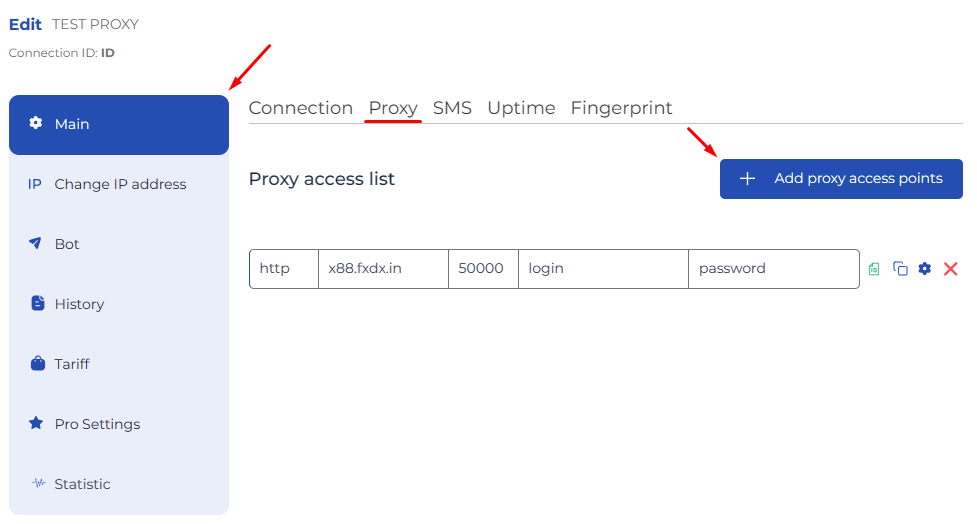
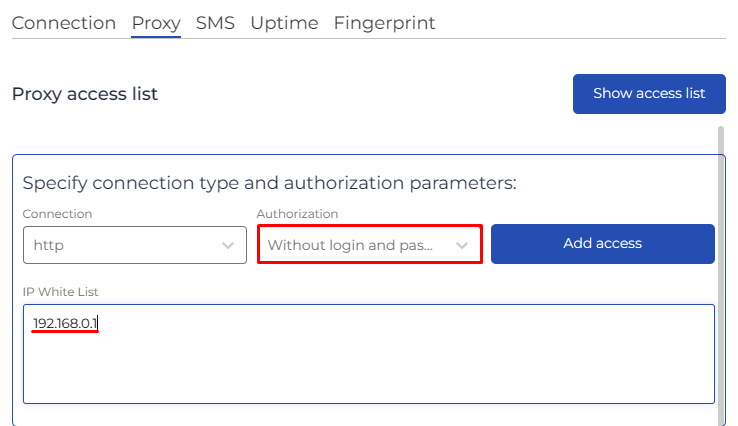
- Select the connection type in the proxy creation settings:
- socks5
- http
It is not necessary to use Login and Password authentication, but in this case you will need to specify a "White list of IP addresses," which will have access to this type of proxy access without sending the username and password in the request.
Adding an iProxy proxy to an Octo Browser profile
- Copy the connection data from the list of available connections by clicking the "Copy" button.

- Paste the entire string into the "Host" field in the profile Connection settings.
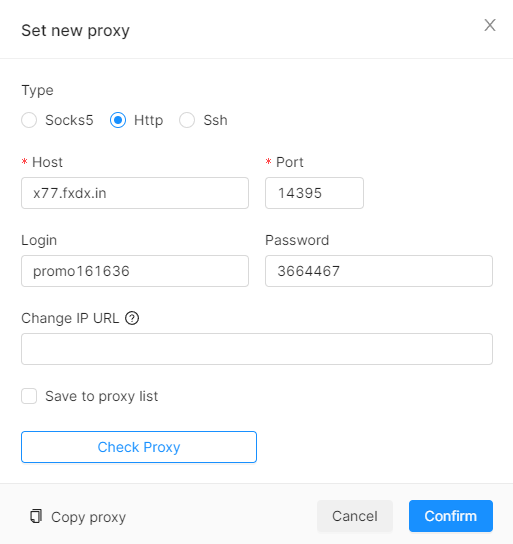
- You can paste a link to change the IP address for this connection into the "Change IP URL" field. You can find this link in the Connection editing menu of your iProxy account.
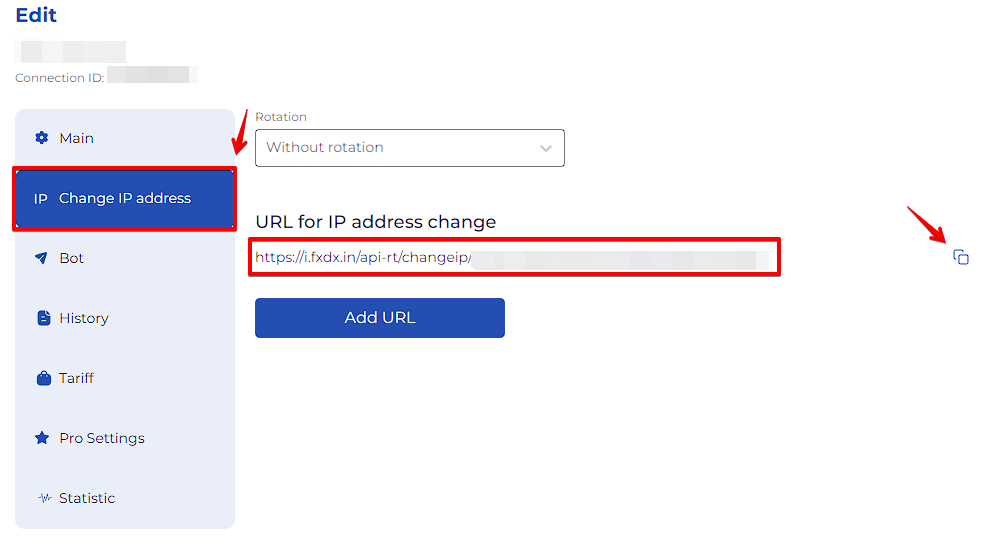
You can also change the IP address in your iProxy account in the list of connections by clicking on the "Change IP" button.

You can also do this in the app itself (iProxy for Android).
For more information on IP address changing options, see the official iProxy FAQ.
IMPORTANT!
You can select the time interval at which the external IP address (the IP address seen by web resources) will automatically change in the Connection editing section. If you need a static IP address, we recommend that you leave this parameter set to "No rotation."

API integration
API integration with iProxy allows you to create and update favorite proxies in your Octo Browser account. To use it, you will need an active Base or higher-tier subscription, as you will need access to the API token.
Setting up integration
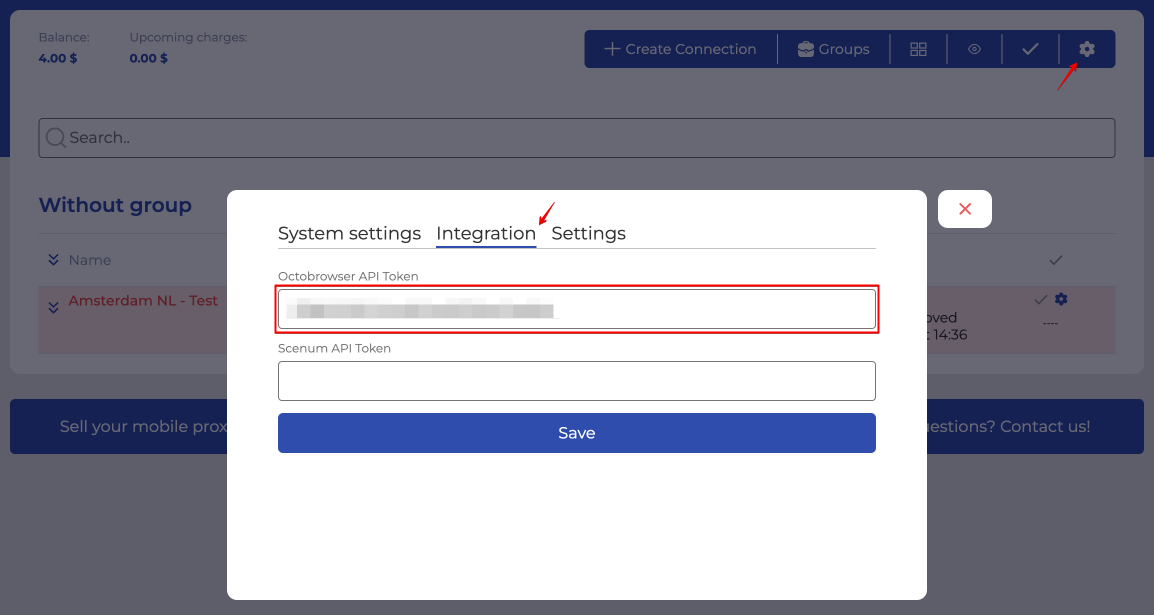
- Click on the gear icon in the top right menu in your personal account.
- Select Integration in the modal window.
- Paste the API token from Octo Browser into the Octobrowser API Token field. You can find the API token in the Additional Settings of Octo Browser.
Synchronizing and creating proxies in Octo Browser
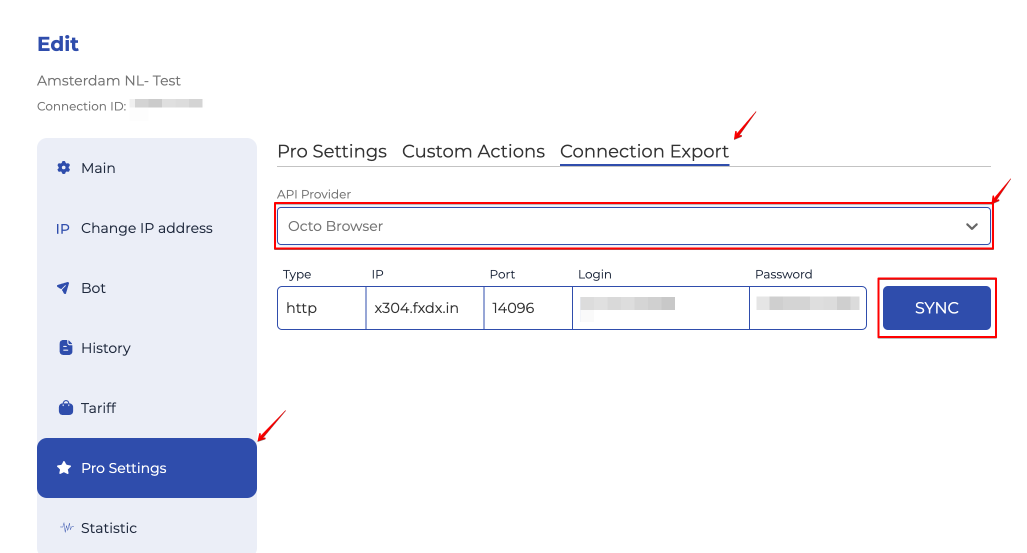
- Click on the gear icon of any proxy.
- Go to the PRO menu.
- Select Connection Export.
- Select Octo Browser from the API Provider drop-down list.
- After this you can click the SYNC button, and a proxy of this type will be created in the Proxies section of Octo Browser.
After a proxy has been created, a RESYNC button will become available, which will update this proxy in case you have made any changes to it and want these changes reflected in Octo Browser.
